- Published on
Event Programming
- Authors

- Name
- Vishok Manikantan
Event Programming
Now, "paradigm" is a big word, but all it means is a way of doing things. In event-driven programming, the flow of the program is determined by events such as user actions (mouse clicks, key presses), sensor outputs, or messages from other programs or threads.
Event programming is a programming paradigm where the flow of the program is driven by events, such as user actions (mouse clicks, key presses) or messages from other programs. In GUI applications, events trigger specific responses, allowing for interactive user experiences.
In Python, event programming is commonly used in GUI applications, web development, and game development. Libraries such as Tkinter, PyQt, and Pygame provide event-driven programming interfaces for building interactive applications.
We will be using Tkinter, a standard GUI toolkit for Python, to demonstrate event programming in Python.
Key Components of Event Programming
An event-driven program typically consists of:
- Events: Actions that occur (like clicking a button).
- Event Handlers: Functions that execute in response to an event (like displaying a message when a button is clicked).
- Widgets: GUI elements like buttons, labels, and entry fields that users can interact with.
Introduction to Tkinter
Tkinter is a standard GUI toolkit for Python. It allows you to create windows and add various widgets to build interactive applications.
Installation
Tkinter is included with Python, so you don't need to install it separately. In case it is not installed, you can install it using:
pip install tk
A Basic Window
To start with Tkinter, you need to create a window. Here's how you can do it:
window = tkinter.Tk()
window.title("Event Programming Example")
window.geometry("400x400")
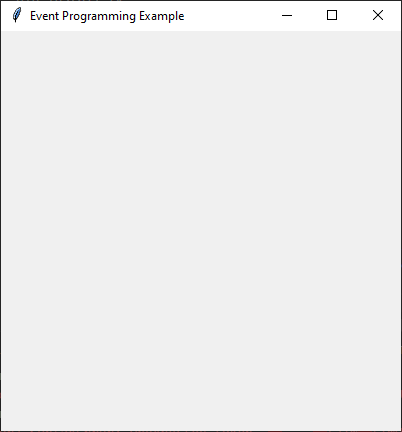
window here is an instance of the Tk class, which represents the main window of the application. The title method sets the title of the window, and the geometry method sets the size of the window. 400x400 is the width and height of the window.
Here's how the window looks:

Adding Widgets with Absolute Positioning
Using absolute positioning allows you to place widgets at specific coordinates within the window. This is equivalent to using "position: absolute" in CSS, if you're familiar with web development.
Here’s how you can add a label, button, and entry widget:
label1 = tkinter.Label(window, text="Enter your name:")
label1.place(x=20, y=20)

entry1 = tkinter.Entry(window)
entry1.place(x=20, y=50)

button1 = tkinter.Button(window, text="Submit")
button1.place(x=20, y=80)
Note that we have to pass the window object as the first argument to each widget. This tells Tkinter to add the widget to the main window.
Labelis used to display text. It is equivalent to that of text element.Entryis used to take input from the user. It is equivalent to that of input element in HTML. (<input type="text">)Buttonis used to trigger an action. It is equivalent to that of button element in HTML.- The
xandyparameters in theplacemethod specify the position of the widget within the window.
Expermienting with Layouts
You can also arrange multiple widgets using the place method for absolute positioning. For example:
label2 = tkinter.Label(window, text="Label 2", bg="lightblue")
label2.place(x=150, y=20)

button2 = tkinter.Button(window, text="Button 2")
button2.place(x=150, y=50)
The bg parameter sets the background color of the label. You can experiment with different colors to customize the appearance of widgets.
FILL and EXPAND Options
Tkinter allows you to manage widget resizing with fill and expand options. Here’s how to use them:
entry2 = tk.Entry(window)
entry2.pack(fill=tk.X)  # Fills horizontally

button3 = tk.Button(window, text="Click Me")
button3.pack(expand=True)  # Expands to fill extra space
fill=tk.Xfills the widget horizontally. You can also usefill=tk.Yto fill vertically orfill=tk.BOTHto fill both directions.expand=Trueallows the widget to expand to fill any extra space available in the window.
Photo Image Widget
Tkinter provides the PhotoImage widget to display images in the GUI. Here’s how you can use it:
image = tk.PhotoImage(file="path/to/image.png")
label = tk.Label(window, image=image)
label.pack()
Here, PhotoImage is used to load the image file. After loading the image, we are passing it as a value to the image parameter of the Label widget, which displays the image in the window, similar to an <img> tag in HTML.
Replace "path/to/image.png" with the path to the image file on your system, relative to the script file. The PhotoImage widget supports GIF, PGM, PPM, and PNG formats.
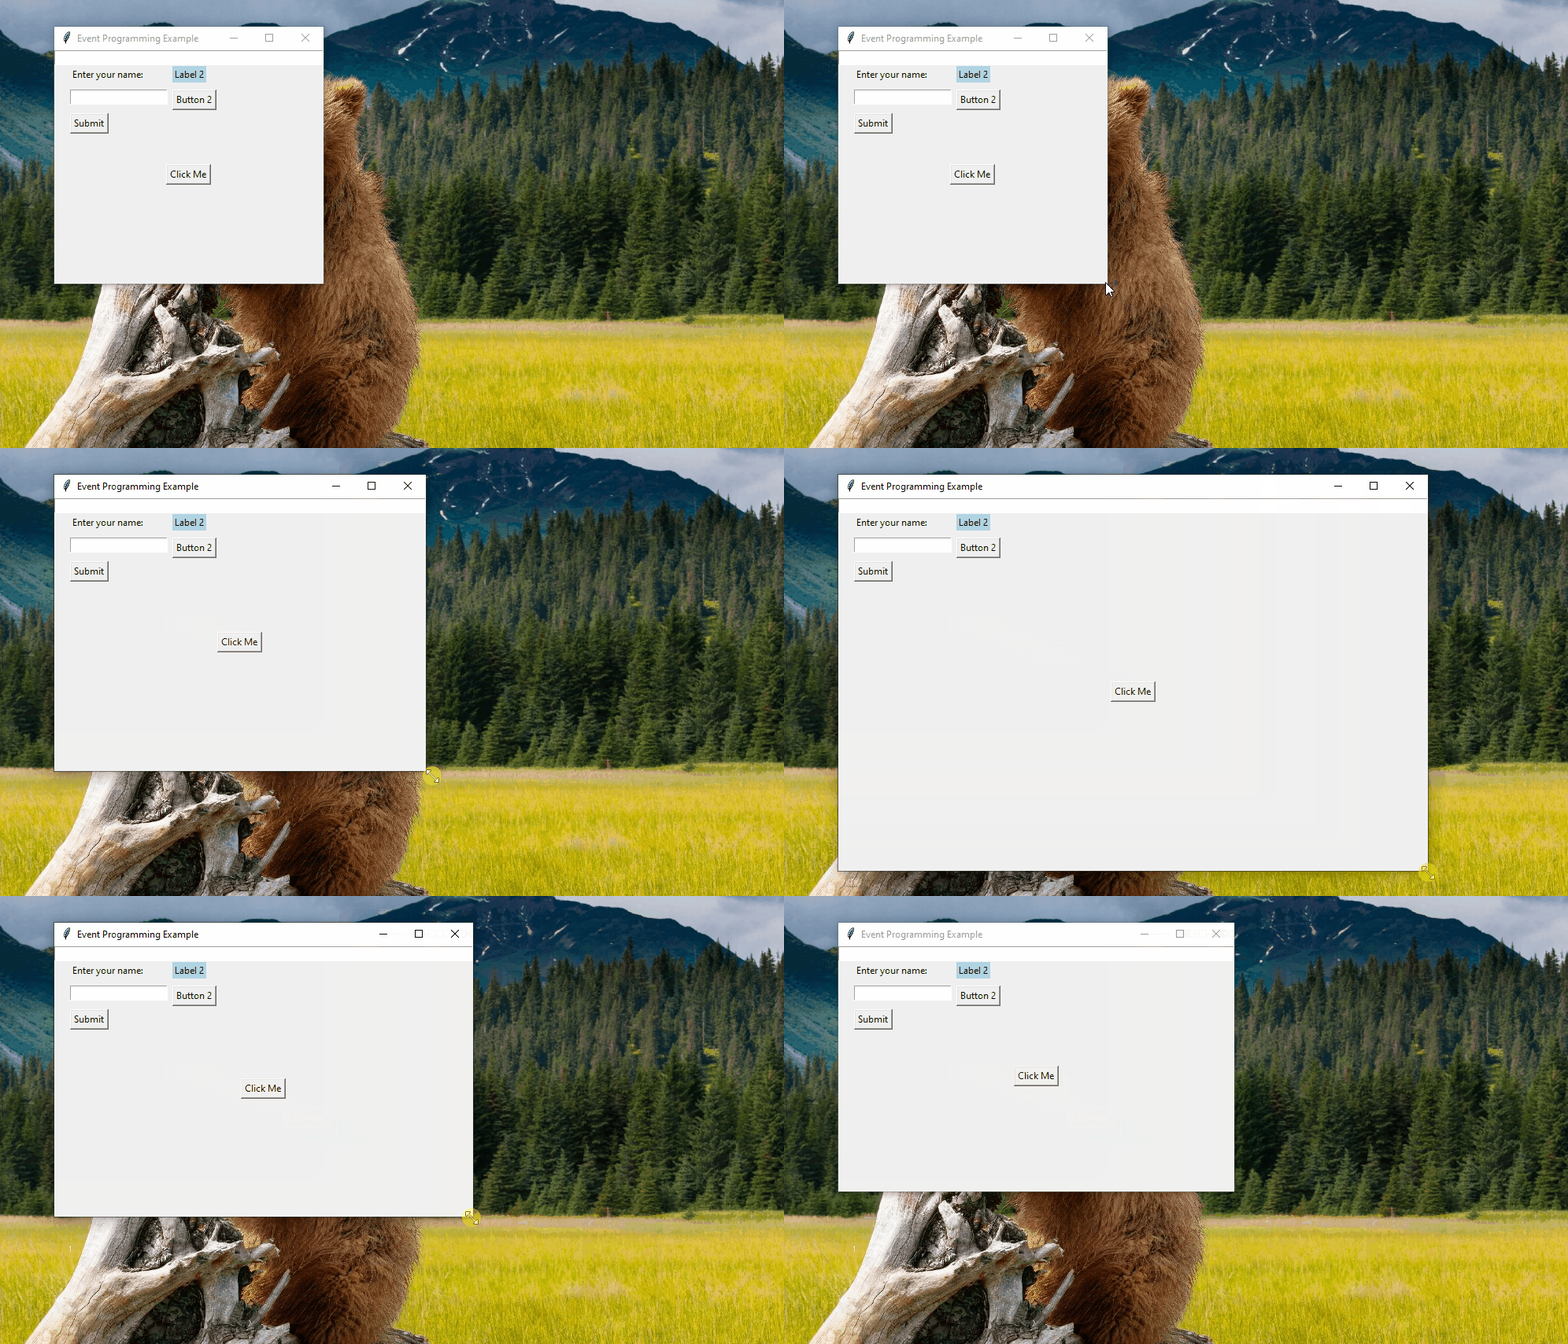
Observing Widget Behavior on Resizing
When you resize the window:
- Widgets set with
fillwill adjust their size according to the specified direction. - Widgets with
expand=Truewill take up any additional space created by resizing.

Full Implementation
Here’s how the complete code looks when putting everything together:
import tkinter as tk

# Create the main window
window = tk.Tk()
window.title("Event Programming Example")
window.geometry("400x400")

# Add widgets using absolute positioning
label1 = tk.Label(window, text="Enter your name:")
label1.place(x=20, y=20)

entry1 = tk.Entry(window)
entry1.place(x=20, y=50)

button1 = tk.Button(window, text="Submit")
button1.place(x=20, y=80)

# Experiment with grid layout
for i in range(3):
    tk.Label(window, text=f"Label {i+2}").place(x=150, y=100 + i * 30)
    tk.Button(window, text=f"Button {i+2}").place(x=250, y=100 + i * 30)

# Using fill and expand options
entry2 = tk.Entry(window)
entry2.pack(fill=tk.X)  # Fills horizontally

button3 = tk.Button(window, text="Click Me")
button3.pack(expand=True)  # Expands to fill extra space

# Run the application
window.mainloop()
Conclusion
In this post, we discussed event programming in Python using Tkinter. We covered the key components of event-driven programming, introduced Tkinter, and demonstrated how to create windows, add widgets, and manage layouts.
I hope after reading this post, you will be able to create atleast a basic GUI application using Tkinter. Feel free to ask questions in the comments if you have any doubts.
Signing off, Vishok Manikantan 🚀